Basic License Server Configuration
📝 NOTES FOR EXISTING USERS
The license file manager from the current installation must be installed (Sentinel version 9.1). Prior versions of the Sentinel License Server are not compatible with the new license file format.
In addition, those running the Sentinel License Server on a Virtual Machine must specifically request a Virtual Machine Enabled license file from CGTech. Attempting to run a VM disabled license from a Virtual Machine will result in error.
This set of instructions assumes that you have a standard Windows network configuration with TCP/IP. You must have administrative privileges in order to install the license server or the Microsoft redistributables.
First, install and configure the license manager service.
Go to the start menu and select the Vericut license folder that was created during the installation process.
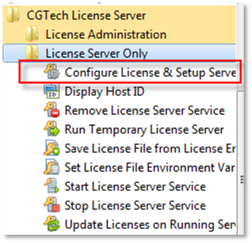
Next, select the license server only folder and then select Configure License and Setup Server. This utility performs the following tasks.
-
Creates a license file from your license email.
-
Sets the LSERVOPS environment variable to point to your new license file location.
- Stops the existing server if one exists.
- Removes the existing license server service.
- Installs the new license server service.
- Updates the new license server service with the new license file features.
If you get any errors during this process please go to the trouble shooting section.
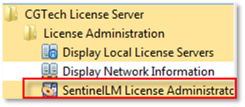
If no errors are generated then run the Sentinel LM License Administrator (wlmadmin.exe) from the start menu, Vericut Installation, License Administration.
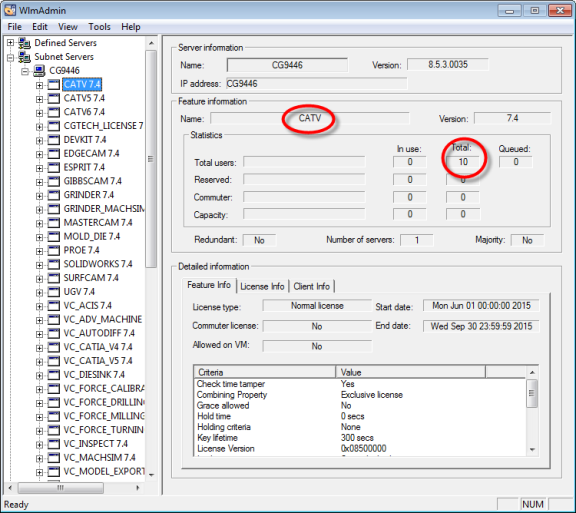
When the license administrator launches, expand out the subnet servers (+) and then expand out the computer name. You should see all you license features appear. Selecting the license feature in the list will display the name of the feature and how many license of the feature you have available.
At this point the client PC’s should be able to run Vericut. If Vericut fails to launch, take note of the error message and go to the trouble shooting section of this guide.
You can then go to the Vericut website to request your license file. Before going to the website to request your license, you need to be prepared to provide your 6-digit company ID, your Host Name (name of the server or PC running the license manager) and the Host ID (the 12-digit MAC address of the server or PC running the license manager).
If you don’t know your 6-digit company ID you can contact you Vericut Sales engineer or the technical support department.
You can locate your host name by opening control panel and selecting System. The host name is the Computer name.
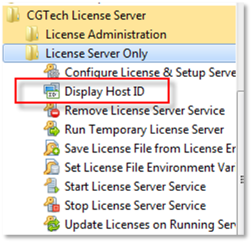
You can determine your Host ID by running the HOST ID utility from the start menu. This will display a command window with 1 or more 12 digit Ethernet addresses. Choose an address from the list.
Example:
Ethernet 1: 0001CF45A789
Ethernet 2: 2001BC23B123
Once you have this information you can go to the Vericut website and complete the license request form. The form will be sent to the email address you specified on the form.