Plane to Point
Location:
Tool Manager > X-Caliper tab > Feature/History group >  (Plane to Point)
X-Caliper tab > Feature/History group > (Plane to Point)
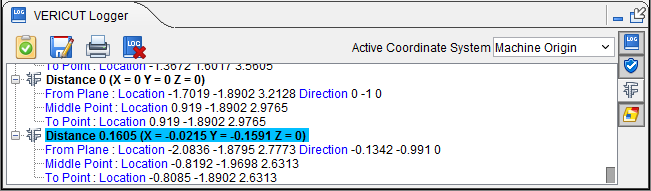
The Plane to Point button enables you to select a plane and point on a material to analyze the distance between them. Once the command button is active, first click on a plane in the graphical display. Notice that a blue arrow will point outwards from the plane you are selecting, helping you to make certain you are selecting the right plane. Second, click on a point you wish to measure from the plane. Once the point is selected, the measurement arrow is displayed at the location of the point. The information will be displayed in your Logger as shown below:
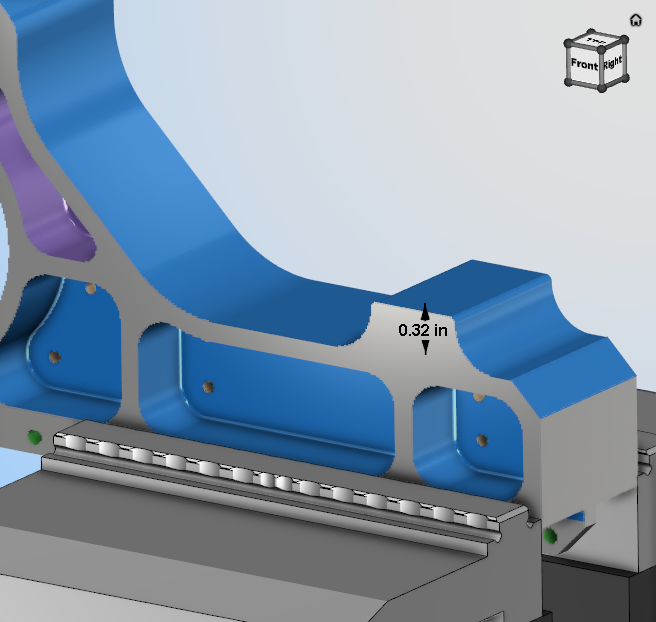
Additionally, the distance measurement will then be superimposed on the material at the point where the measure was taken in the View window as shown below:
This measurement will display only so long as any of the Feature/History group command buttons are active. All measurements will disappear once none of these buttons are active but the measurements can be viewed again by turning on one of these command buttons. This feature can also be edited by left-clicking on the measurement thus displaying the following menu:
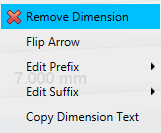
Remove Dimension — clicking the red x deletes the measurement permanently.
Flip Arrow — clicking this reverses the direction of the arrow.
Edit Prefix — use this feature to edit in text that will appear before the measurement via a text edit window. Click Default on the edit window that appears to remove entered text.
Edit Suffix — use this feature to edit in text that will appear after the measurement via a text edit window. Click Default on the edit window that appears to remove entered text.