Report Template Preview window
The Report Template Preview window, displayed in the viewing area of the Report Template window and the User-Defined Tag Values window, enables you to see a preview of the report that will be created using the report template shown in the Report Template Content window. In the case of the User-Defined Tags window, the Report Template window enables you to view the specified User-Defined Tag values in the context of the Vericut report.
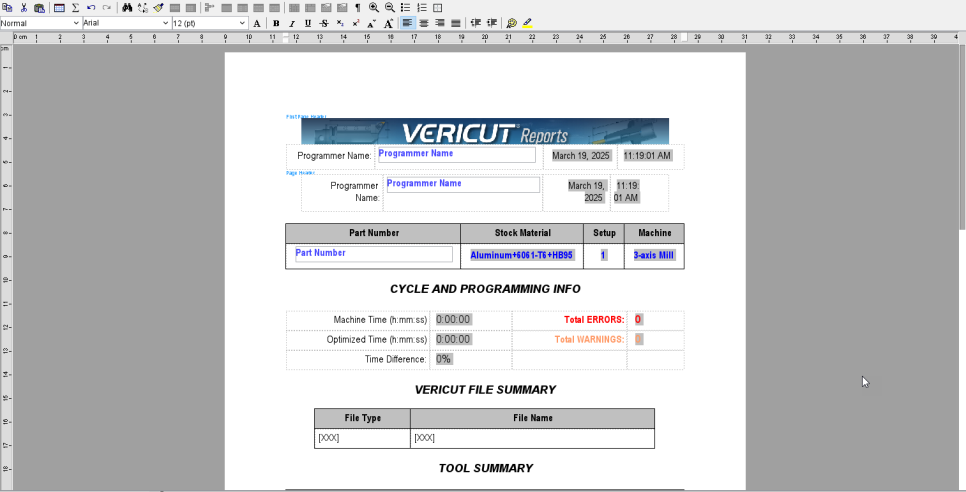
The Report Template Preview window:
- Only displays report information for the "current" setup.
- Does not support two-byte languages (Chinese, Japanese, Korean)
The Report Template Preview window can be edited and manipulated with the Report Template Preview Toolbar.

This toolbar contains many functions associated with most word processing programs, including:

Copy — Use to copy a selected portion of text.
Cut — Use to cut a selected portion of text.
Paste — Use to paste a cut or copied portion of text.

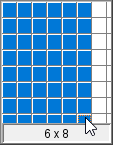
Design Table — Use to create a table. Click with the left-mouse button and drag across the displayed table below to set the number of rows and columns.
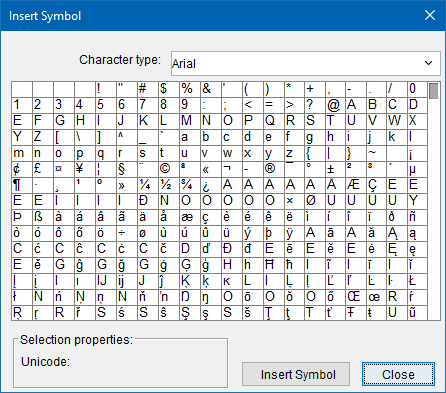
Insert Symbol — Opens a Symbol window enabling you to choose from a wide array of symbols to insert into your report.
Undo — Use this icon to undo a previous action.
Redo — Use this icon to restore a previously undone action.

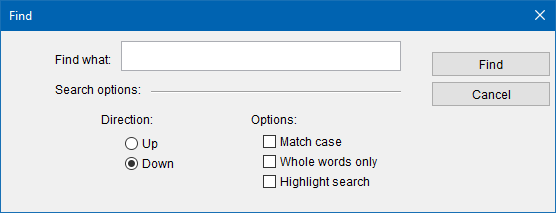
Find — Opens a Find window enabling you to search for words or strings of text within the report.
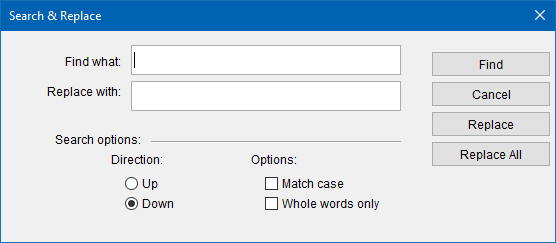
Replace — Opens a Search & Replace window enabling you to find specific words or strings of text within the report and then replace them.
Copy Formatting — Use to copy the formatting of a highlighted portion of the report.
Insert Row — Use to add a new row to an existing design table. This option is only available when a design table is already selected.
Insert Column — Use to add a new column to an existing design table. This option is only available when a design table is already selected.

Delete Cells — Removes selected cells from a design table. This option is only available when a design table is already selected.
Select Table — Highlights an entire design table. This option is only available when a design table is already selected.
Select Column — Highlights an entire column within a design table. This option is only available when the mouse cursor is within a design table.
Select Row — Highlights an entire row within a design table. This option is only available when the mouse cursor is within a design table.
Select Cell — Highlights an entire cell within a design table. This option is only available when the mouse cursor is within a design table.

Split Cell — Breaks an existing cell into separate cells. This option is only available when the mouse cursor is within a design table.
Merge Cells — Combines separate cells into one cell. This option is only available when two or more cells are highlighted within a design table.
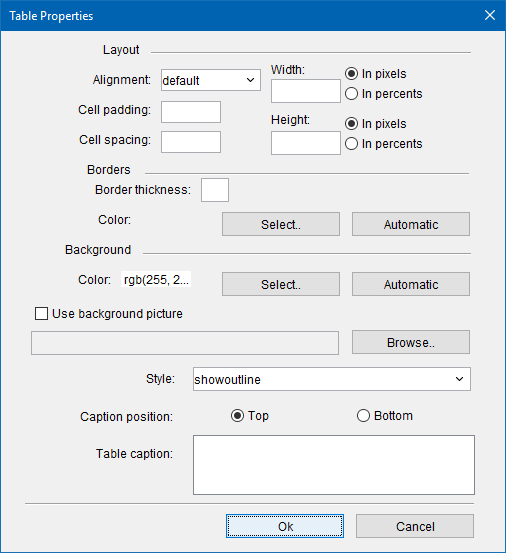
Table Properties — Opens a table properties window enabling you to set formatting for a selected design table.
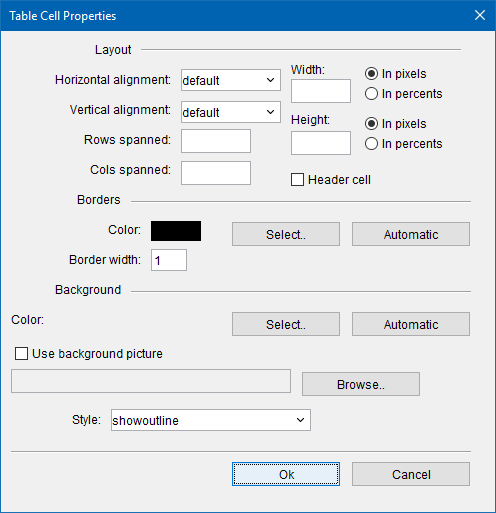
Cell Properties — Opens a Table Cell Properties window enabling you to formatting for a selected cell within a design table.
Show Paragraphs — Use to display where paragraph breaks occur within the report. Paragraph breaks will be marked with a symbol.
Zoom In Text — Use to zoom in on the report.
Zoom Out Text — Use to zoom out on the report.
(Bullets) — Use to add a bulleted list to the report.
(Numbers) — Use to add a numbered list to the report.
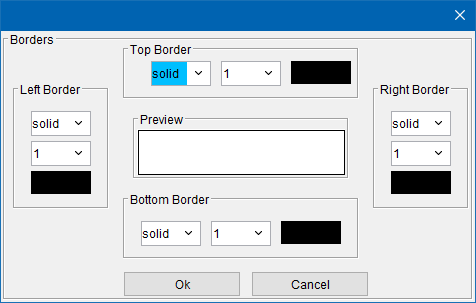
Borders — Opens a Borders window enabling you to format the borders of the report.

Heading pulldown menu — Use this pulldown menu to select whether the text should be treated as a Heading or a Paragraph item.
Font pulldown menu — Use this pulldown menu to select the desired font.
Font Size pulldown menu — Use this pulldown menu to select the desired font size.
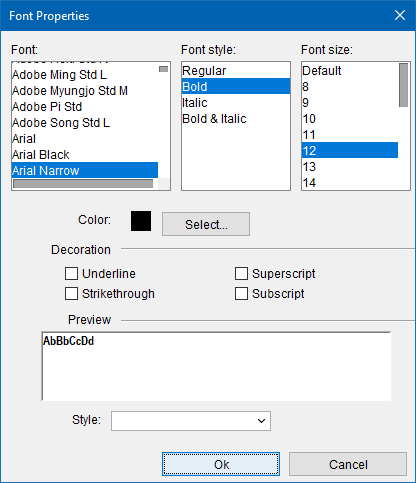
Font Properties — Opens the Font Properties window enabling you to format your report font.

Bold — Use to make your text bold.
Italic — Use to italicize your text.
Underline — Use to underline your text.
Strikethrough — Use to add a strikethrough to a selected portion of text.
Subscript — Use to format subscript (smaller text just below the text line).
Superscript — Use to format superscript (smaller text just above the text line).
Decrease Font Size — Reduces the size of your font.
Increase Font Size — Makes font size larger.

Left-Align/Center/Right-Align/Justify — Use these icons to align the text.
Decrease Indent — Use to move a selected portion of text five spaces to the left.
Increase Indent — Use to move a selected portion of text five spaces to the right.
Foreground Color — Use this menu to select the color of a foregrounded item (e.g., the font color). The square in the pulldown icon will change colors to reflect which color was selected from the menu. Color is initially black by default.
Highlight Color — Use this menu to select the color of a background item (e.g., highlight the field behind a word). The square in the pulldown icon will change colors to reflect which color was selected from the menu. Color is initially white by default.
Using Vericut Reports
Creating a "Custom" Report Template
Use the procedures described below to create a custom report template.
Modify an existing report template to create a custom template:
-
Depending on the type of report template that you are creating, open the Report Template window in the appropriate location.
Report tab > Report Template > Edit in the Vericut menu ribbon.
Project tab > Tools > Reports > Report Template in the Vericut menu ribbon. -
In the Report Template window menu ribbon, select Open File.
- Use the Open Report Template window to select one of the standard report templates located in the library folder of your Vericut installation.
- In the Report Template window, use the features on the Page Layout tab to add, remove or modify items related to the "content" and "page layout" of the report.
- In the Report Template window, use the features on the Styles tab to add, remove or modify style records related to the "format" (font, size, colors, etc.) of the report.
- In the Report Template window, use the features on the User-Defined Tags tab to add or remove "generic" records included in a report template that will be updated with job specific information at the time the report is created.
- In the Report Template window, use Save As to display the Save Report Template window.
- Specify the /path/filename for the "custom" report template file, and then Save.
Create a new "custom" report template:
-
Depending on the type of report template that you are creating, open the Report Template window in the appropriate location.
Report tab > Report Template > Edit in the Vericut menu ribbon.
Project tab > Tools > Reports > Report Template in the Vericut menu ribbon. -
In the Report Template window, select New File to clear the Report Template window.
- In the Report Template window, use the features on the Styles tab to add style records related to the "format" (font, size, colors, etc.) of the new report template. At least one style record must be created before you can start adding "content" items to the Page Layout tab.
- In the Report Template window, use the features on the User-Defined Tags tab to add "generic" records included in a report template that will be updated with job specific information at the time the report is created.
- In the Report Template window, use the features on the Page Layout tab to add items related to the "content" and "page layout" of the report.
- In the Report Template window, use Save As to display the Save Report Template window.
- Specify the /path/filename for the newly created "custom" report template file, and then Save.
See Report Template window section of Vericut Help for additional information.
Create a Report Using a Report Template
Report Templates are used to specify the content and format of various reports that can be created in Vericut. At the time that the report is created, information created by Vericut during the "current" session and other designated locations is assembled according to the content and format instructions contained in the report template and a report file is created in a specified location.
The report is a file that contains information about the Vericut session as specified in the report template. Depending on where in Vericut the report is created from, and the "template" used, a wide variety of information such as: the current NC program and project files, part images, machining times, optimization results, tool library and inspection data can all be output as a report. The reports can be output in Text, HTML or PDF format.
Use the procedures below to create various reports in Vericut.
To create a report file showing an overview of the results of the current Vericut session:
This report will contain information equivalent of the type found in the Results File in previous releases.
-
Ensure Vericut is configured to create the desired data for the report, for example: auto-saving images, optimizing, etc., then process the NC program(s). For example, if you want images of the workpiece saved at cutter changes to appear in the report file:
Click Project tab > Settings > AutoSave tab: View Capture group.
Click Properties - ensure Type is set to save JPEG images, click OK.
In the Auto Save group, select Cutter Change and File End, then enter the Shade Copy File name (.jpg extension), click OK.
If the report is to contain optimization data, make sure that Optimization is turned on. -
Select
 (Play / Start-Stop Options), to process the NC program(s).
 -
Select the report template file to be used: Report tab > Report Template > Edit
-
In the Report Template window, select Open File and use the file selection window to select a report template (.xml) file. You can select one of the Vericut supplied "standard" template files (vericut_xyz.VcTemplate), found in the "library" folder of your Vericut installation or a "custom" template file you have created, then Open.
- Close to dismiss the Report Template window.
-
Enter any job-specific User-Defined Tag values required by the selected user template: Report tab > User-Defined Tag Values.
-
In the User-Defined Tag Values window, enter/edit any of the User-Defined Tag values as necessary, then OK to save the tag values and dismiss the window.
📝 NOTE: Some or all of the User-Defined Tag values may have been previously defined when an earlier report was created. Tag values are stored in the project file. Also, if you do not enter all of the User-Defined Tag values during this step, you will be prompted for any missing values at the time that the report is created.
-
Create the Report: Report tab > Create Report > report format (where "report format" is Text, HTML or PDF)
-
In the Save Vericut Report window, specify the /path/file name for the report file to be created. If you want the report to display in your browser immediately after the report is created, make sure that View Report is toggled "on", and then Save. Vericut will now write out the report file, in the specified format, to the specified location and display the report in your browser if you indicated that.
To create a Tool Library report file:
-
In the Tool Manager window, Report tab > Create Report > report format (where "report format" is Text, HTML or PDF)
-
In the Save Vericut Report window, specify the /path/filename for the report file to be created. If you want the report to display in your browser immediately after the report is created, make sure that View Report is toggled "on", and then Save. Vericut will now write out the report file to the specified location and display the report in your browser if you indicated that.
📝 NOTE: By default Vericut will use the vericut_tools.VcTemplate report template, located in the "library" folder of you Vericut installation. If necessary, use Report tab > Report Template to select a report template (as described in step 2 above) or Report tab > User-Defined Tag Values to enter/edit job specific values related to the chosen report template (as described in step 3 above).
To create an Inspection report file:
In the Inspection window, select Report tab > Create Report > report format (where "report format" is Text, HTML or PDF). You can also use ![]() (Export HTML) or
(Export HTML) or ![]() (Export PDF), located in the Inspection Icon Bar, to create an HTML or PDF formatted report.
(Export PDF), located in the Inspection Icon Bar, to create an HTML or PDF formatted report.
Vericut will display the report based on the "current" Inspection file and write out the report file, using the specified format, to the same folder where the Inspection file is located.
If the "current" Inspection file has not been saved, the Save Vericut Report window will display. Specify the /path/filename for the report file to be created, and then Save. Vericut will then save the report and display the Inspection report using your default browser.
📝 NOTE: By default Vericut will use the inspection.VcTemplate report template, located in the "library" folder of you Vericut installation. If necessary, use Report tab > Report Template to select a report template (as described in step 2 above) or Report tab > User-Defined Tag Values to enter/edit job specific values related to the chosen report template (as described in step 3 above).
See Report Template window section of Vericut Help for additional information.
Customizing Headers in Vericut Generated Tables
The default column headers used in Vericut generated tables (File Summary table, Tool Summary table, and View Capture table) are fully customizable. Use the following procedures to customize the headers in these tables:
Customize the headers in Vericut generated tables in existing report templates:
-
In the Vericut main menu ribbon, Report tab > Report Template > Edit to display the Report Template window.
-
Select the Page Layout tab.
-
If the report template containing the table headers to be modified is not currently displayed, use Open File, in the Report Template window menu ribbon, to open the appropriate report template file.
-
When the correct report template is displayed, highlight the table record containing the headers to be customized, and then select Edit in the Report Template menu ribbon to display the Report Preview window. (You can also right-click in the highlighted table and select Edit from the menu that displays, or simply double click on the highlighted table record to display the Report window)
-
In the Report Preview window, click on the header text to be modified, and then enter the desired header text. In a similar manner, continue to modify any other of the header text fields. When finished, select OK to dismiss the Report window and return to The Report Template window.
-
In the Report Template window, use the same procedure to customize the headers in any other Vericut generated table, select Save File > Save (or Save As) to save the customized report template file. When you generate a report using the customized report template, Vericut generated tables will have your custom headers instead of the default ones.
Customize headers when adding Vericut generated tables to a report template:
Using the general procedures described in Creating a "Custom" Report Template, add a Vericut generated table with custom headers as follows:
-
In the Report Template window, highlight the record that you want the Vericut generated table added after, then select Table in the Report Template window menu ribbon (or right-click on the highlighted record and select Add > Table in the menu that displays) to display the Report Template Tables window.
-
In the Report Template Tables window, select the type of Vericut generated table that you want to add from the Table pull-down list.
-
For each record in the table, click on the header text to be modified, and then enter the desired header text. In a similar manner, continue to modify any other of the header text fields. When finished, select OK to dismiss the Table window and return to the Report Template window.
Continue creating the custom report template as described in Creating a "Custom" Report Template.
See Report Template window section of Vericut Help for additional information.
Using Data from a File in a Report
Use the following procedure to add data from a text file and use it in a report.
In your text file:
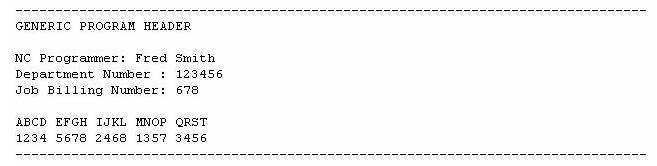
Set up a text file similar to the following example which is used to put generic header information in a report. Notice that each data entry is separated by a blank space.
GENERIC PROGRAM HEADER

NC Programmer: Fred Smith

Department Number: 123456

Job Billing Number: 678

ABCD EFGH IJKL MNOP QRST

1234 5678 2468 1357 3456
Setting up the text file in this manner will result in a single column table. See Example 1 results.
You can also structure your text file to create a multiple column table as follows:
Table Data Source:, text file, , ,

DATA:, , , ,

ABCD,EFGH,IJKL,MNOP,QRST

1234,5678,2468,1357,3456
Notice that the data for each column is separated by "," characters. The number of columns that will appear in the report's table is determined by the number of columns of data that are specified in the first row. Notice how blank spaces separated by "," characters are used to designate empty cells which are used as "place holders" so that the table has enough columns to accommodate the data in the lower rows of the table.
Setting up the text file in this manner will result in a multiple column table. See Example 2 results.
In the Report Template Window:
-
In the Vericut menu ribbon, select Report tab > Report Template > Edit to open the Report Template window.
-
In the Report Template window menu ribbon, Open File to open an existing report template file or New File to create a new report template file.
-
Click on User-Defined Tags tab.
-
In the User-Defined Tag Values window, click on the Add button. (You can also right-click in the window and select Add from the menu that displays.)
-
In the record that is added enter the Tag Name, in this case, generic_header in the Tag Name field.
-
Click in the Type field and select Table from the pull-down list.
-
Click on the Page Layout tab.
-
Right-click in the window and select Add > Table from the menu that displays. (Or select Table in the Report Template menu ribbon)
-
In the Report Template Tables window, click on the "pull-down" button at the right of the Table field and select the user-defined tag name that you set up for this table. In this case, generic_header.
-
Use the other Report Template Tables window features to further define how the table will be displayed in the report, then OK.
-
In the Report Template menu ribbon, Save File > Save File to save the report template file, then Close.
Create the report:
-
In the Vericut menu ribbon, select Report tab > Create Report > format, where format is Text, HTML or PDF.
-
In the Save Vericut Report window, enter the /path/filename for the report to be created, and then Save.
-
In the User-Defined Tag Values window, enter the /path/filename of the text file, to be used to populate the table in the report, in the Tag Value field. Click OK.
The output for the tables you just added (using Text format) should be similar to the following (depending on your Table feature settings):
Example 1 results:
Example 2 results:

See Report Template window section of Vericut Help for additional information.
Using PPRINT Info from an NC Program in a Report
Using Vericut comment records in the NC program file enables you to specify User-Defined Tag values, or define the content for tables, for use in Vericut reports. Use the following procedures to extract PPRINT information from the NC program for use it in a Vericut report.
In the Report Template window:
-
In the Vericut menu ribbon, select Report tab > Report Template > Edit to open the Report Template window.
-
In the Report Template window menu ribbon, select Open File to open an existing report template file or New File to create a new report template file.
Add table data directly from PPRINT data in the NC program:
-
Click on User-Defined Tags tab.
-
In the User-Defined Tags tab, click on the Add button (you can also right-click in the window and select Add from the menu that displays).
- In the record that is added enter the Tag Name, in this case, setup_info in the Tag Name field.
- Click in the Type field and select Table from the pull-down list.
- Click on the Page Layout tab.
- In the Page Layout tab, right-click in the window and select Add > Table from the menu that displays (or select Table in the Report Template window menu ribbon).
- In the Report Template Tables window, click on the "pull-down" button at the right of the Table field and select the user-defined tag name that you set up for this table. In this case, setup_info, indicating that the table data is coming from a User-Defined Tag.
- Set Table Width = 0%. This will allow the width of the table to be defined by the incoming data.
- Use the other Report Template Tables window features to further define how the table will be displayed in the report, then OK.
Add table data from a text file using PPRINT data in the NC Program:
-
Click on the User-Defined Tags tab.
-
In the User-Defined Tags tab, click on the Add button. (You can also right-click in the window and select Add from the menu that displays)
- In the record that is added enter the Tag Name, in this case, table_data in the Tag Name field.
- Click in the Type field and select Table from the pull-down list.
- Click on the Page Layout tab.
- In the Page Layout tab, right-click in the window and select Add > Table from the menu that displays. (Or select Table in the Report Template window menu ribbon)
- In the ReportTable window, click on the "pull-down" button at the right of the Table field and select the user-defined tag name that you set up for this table. In this case, table_data, indicating that the table data is coming from a User-Defined Tag.
- Set Table Width = 0%. This will allow the width of the table to be defined by the incoming data.
- Use the other ReportTable window features to further define how the table will be displayed in the report, then OK.
Add a picture from a file using PPRINT data in the NC program:
-
Click on User-Defined Tags tab.
-
In the User-Defined Tags tab, click on the Add button (you can also right-click in the window and select Add from the menu that displays).
- In the record that is added enter the Tag Name, in this case, add_picture in the Tag Name field.
- Click in the Type field and select Picture From File from the pull-down list.
- Click on the Page Layout tab.
- In the Page layout tab, right-click in the window and select Add > Picture from the menu that displays (or select Picture in the Report Template window menu ribbon).
- In the Picture window, click on the "pull-down" button at the right of the Table field and select the user-defined tag name that you set up for this picture. In this case, add_picture, indicating that the picture data is coming from a User-Defined Tag.
- Use the other Picture window features to further define how the picture will be displayed in the report, then click OK.
Add text using PPRINT data in the NC program:
-
Click on User-Defined Tags tab.
-
In the User-Defined Tags tab, click on the Add button (you can also right-click in the window and select Add from the menu that displays).
- In the record that is added enter the Tag Name, in this case, add_text in the Tag Name field.
- Click in the Type field and select Text from the pull-down list.
- Click on the Page Layout tab.
- In the Page Layout tab, right-click in the window and select Add > Text > User-Defined Tags > add_text from the menu that displays
📝 NOTE: If you had not previously added User-Defined Tag add_text using the User-Defined Tag tab, you could add it here using Add > Text > User-Defined Tags > Add User-Defined Tag from the menu that displays (or select Edit > Add > Text > User-Defined Tags > Add User-Defined Tag in the Report Template window menu ribbon).
- Click on the Page Layout tab, set the other record characteristics (Category, Alignment, Style, etc.) as appropriate.
- In the Report Template window menu ribbon, Save File > Save File to save the report template file, then Close.
In your NC program file:
Set up the PPRINT statements in your NC program similar to the following examples. The examples are shown in the format that they would appear in a G-Code NC program file. They can similarly be set up using the "PPRINT/Vericut-..." format for APT and CLS NC program files.
See Controlling Vericut with Comment Records, in the Automating Vericut section, in the Vericut Help Library, for additional information.
Add table data directly from PPRINT data in the NC program:
(Vericut-BEGINTABLE "setup_info")
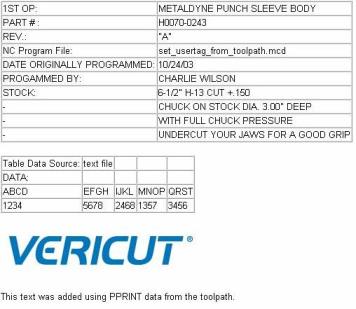
( 1ST OP, METALDYNE PUNCH SLEEVE BODY )
( PART #,H0070-0243 )
( REV.,"A" )
( NC Program File,L1H0070-0243.TXT)
( DATE ORIGINALLY PROGRAMMED,10/24/03 )
( PROGAMMED BY,CHARLIE WILSON )
( STOCK,6-1/2" H-13 CUT +.150 )
(- ,CHUCK ON STOCK DIA. 3.00" DEEP )
(- ,WITH FULL CHUCK PRESSURE )
(- ,UNDERCUT YOUR JAWS FOR A GOOD GRIP )
(Vericut-ENDTABLE)
Notice the first and last statements in this group. Vericut-BEGINTABLE is used to designate the start of a group of PPRINT statements that are to be included in the report. "setup_info" is the name that is used to identify this particular group of statements. Vericut-ENDTABLE is used to designate the end of a group of PPRINT statements that are to be included in the report.
Add table data from a text file using PPRINT data in the NC program:
(Vericut-USERTAG "table_data"="/example/table_data.txt")
The content of the example text file, table_data.txt, is shown below.
Table Data Source:, text file, , ,

DATA:, , , ,

ABCD,EFGH,IJKL,MNOP,QRST

1234,5678,2468,1357,3456
Notice that the data for each column is separated by "," characters. The number of columns that will appear in the report's table is determined by the number of columns of data that are specified in the first row. Notice how blank spaces separated by "," characters are used to designate empty cells which are used as "place holders" so that the table has enough columns to accommodate the data in the lower rows of the table.
📝 NOTE: See Using Data from a File in a Report for additional information related adding table data from a text file.
Add a picture from a file using PPRINT data in the NC program:
(Vericut-USERTAG "add_picture"="/hhelp/vericut/vericut.jpg")
Add text using PPRINT data in the NC program:
(Vericut-USERTAG "add_text"="This text was added using PPRINT data from the toolpath.")
Create the report:
-
Generate the NC program containing the PPRINT statements described above.
-
In the Vericut menu ribbon, select Report tab > Create Report > format, where format is Text, HTML, or PDF.
- Enter the /path/filename for the report to be created, and then Save.
- The output for the table records you just added (in HTML format) should be similar to the following picture (depending on your feature settings and the contents of the text and image files you use.):
See Report Template window section of Vericut Help for additional information.