HUD Control
Info tab >  (HUD Control)
The HUD Control command button opens the HUD Control window enabling you to specify the way certain elements of Vericut are displayed. HUD stands for Head-Up Display.
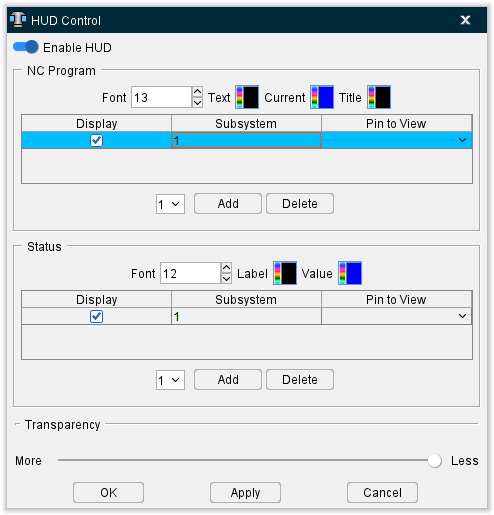
Enable HUD — Toggle this feature on (slider to the right) to display the HUD in the View window. When this feature is off (slider to the left) HUD will not display in the View window. HUD can also be toggled on by right-clicking the View screen and selecting Enable HUD from the right mouse button (RMB) menu that generates. The HUD can also be disabled this same way only the menu option to click will be Disable HUD if the HUD is active.
Font — This field controls the size of the text.
 Text, Current, and Title — Use the icon display a color palette enabling you to specify the color that you want the information in the HUD Control window to be displayed in. The general text, the current line, and the title all can be displayed in different colors.
The right side of the icon shows the current color being used for the information in the HUD Control window. To change the color for the information, click on the icon to display the color palette window shown below.
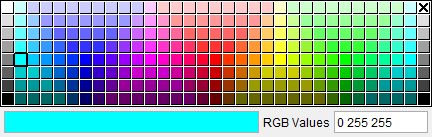
Click on a color in the color palette window, to specify the color for the information in the HUD Control window. The color palette will close and the right side of the icon in the HUD Control window icon bar will update to reflect the selected color.
To close the color palette window without changing the color, click on the  in the upper right corner of the color palette.
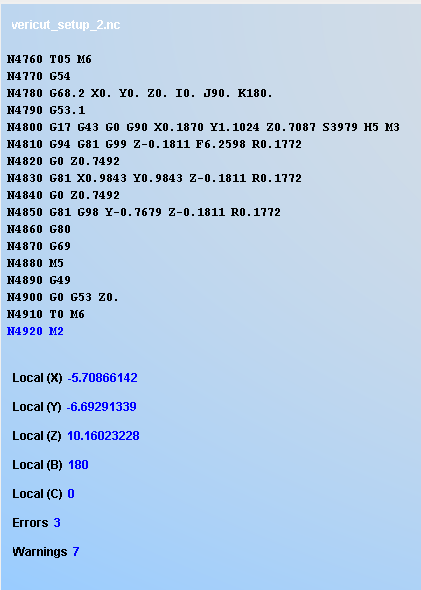
The following is an example of an HUD for the NC Program where the Title is white, the Current Line is blue, and the Text is black:
Display — By toggling this feature on (checked) the HUD will be displayed. By toggling it off (not checked) the HUD will not display.
Pin to View — Use this dropdown menu to assign the HUD to be pinned to any view.
NC Program — This section is used to add an HUD for the NC Program to any view.
Status — This section is used to add an HUD for the Status window to any view.
Status dropdown menu — This menu is used to select the Status for the HUD.
Add — Adds a new HUD in the desired section.
Delete — Deletes the highlighted HUD.
Transparency slider — Controls how visible the HUD is with More being almost completely invisible and less being the most visible.
OK — Closes the HUD Control window and saves any changes made.
Apply — Saves the HUD Control window changes without closing the window.
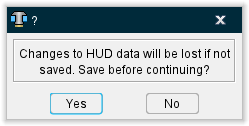
Cancel — Closes the window without saving changes. Canceling will also prompt the following display: