NC Program (NC Program panel)
Location:
Info tab >  (NC Program)
Toolbar short cut: ![]()
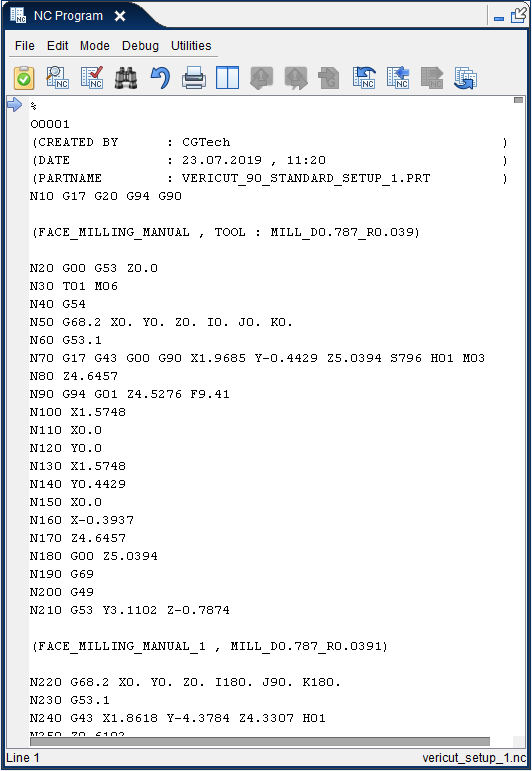
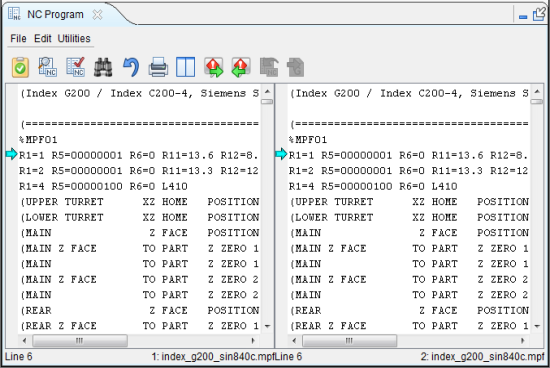
The NC Program command button opens the NC Program panel displaying the NC program file being simulated. In this panel, you can scroll through the entire file to see all the records, search for text forward and backward, print, and more. An arrow pointer indicates the current NC Program record that is being processed. The panel is updated when a new NC program file is processed, such as when multiple NC program files are to be simulated.
The NC Program panel is one of the dockable panels enabling you to dock it inside the Vericut main window if you choose. See Personalizing the Vericut Main Window section of Vericut Help for additional information.
📝 NOTE: When the NC Program panel is docked, make sure that you click in the panel so that it becomes the "active" panel before using F1 to get help specific to the panel. Otherwise F1 will go to the Vericut Help Library.
 (Close) — Located at the end of the tab, this icon enables you to close the NC Program panel.
 (Close) — Closes the Program panel. This icon is only displayed when the NC Program panel is not docked.
💡 Tip: You can edit the NC program file using the Utilities tab > NC Program function in Vericut.
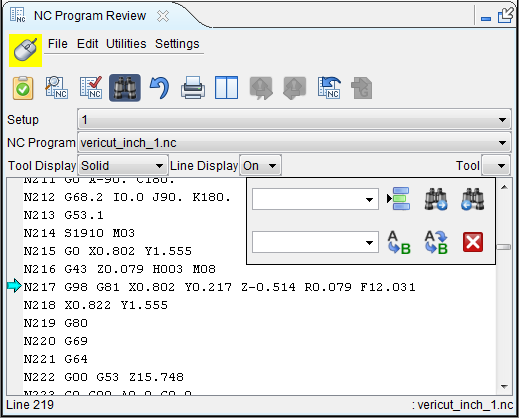
The NC Program panel will display as shown below for most types of NC programs. The blue arrow ![]() indicates the NC block that is being read and processed.
indicates the NC block that is being read and processed.
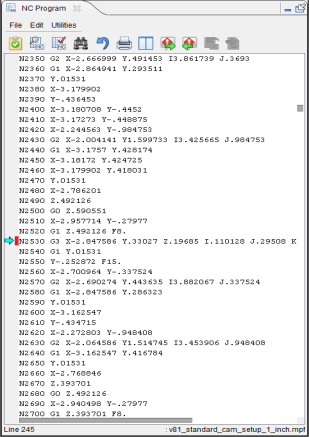
The NC Program panel will display as shown below for NC programs where Cutter Compensation is active and "look ahead" is required. In this case the green arrow ![]() indicates the block that is actually being processed and the blue arrow
indicates the block that is actually being processed and the blue arrow ![]() indicates the NC block that is being read as a result of "look ahead" mode.
indicates the NC block that is being read as a result of "look ahead" mode.
The NC Program panel will display with a separate area for each channel for sync'd programs as shown below. You have the option of displaying these areas either vertically or horizontally as shown in the pictures below.
Tiled Vertical
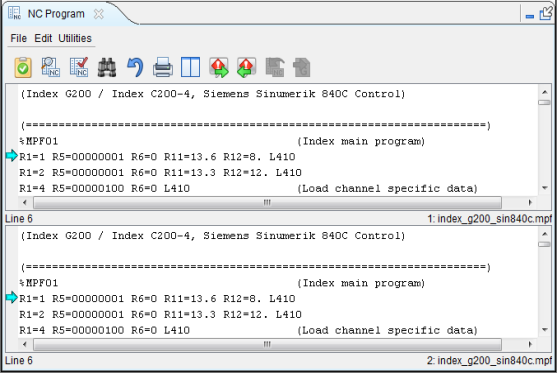
Tiled Horizontal
Processing status of the current record:
![]() (Processing Current Record) — The current record for the particular subsystem is still being processed. In the Tiled Vertical NC Program panel above, subsystem 1 is still processing the current record. This feature corresponds to Processing Current Record processing status used in the Call Stack panel.
(Processing Current Record) — The current record for the particular subsystem is still being processed. In the Tiled Vertical NC Program panel above, subsystem 1 is still processing the current record. This feature corresponds to Processing Current Record processing status used in the Call Stack panel.
 (Finished Current Record) — The current record for the particular subsystem has finished processing and is ready to go on to the next record. In the Tiled Horizontal NC Program panel above, subsystem 2 is finished processing the current record. This feature corresponds to the Finished Current Record processing status used in the Call Stack panel.
![]() (Sync) — The current record for the particular subsystem is a Sync code as shown for subsystem 1 in the Tiled Horizontal NC Program panel above. The subsystem will remain in a “wait” state until the corresponding Sync code is encountered in the other subsystem(s). This feature corresponds to the Sync processing status used in the Call Stack panel.
(Sync) — The current record for the particular subsystem is a Sync code as shown for subsystem 1 in the Tiled Horizontal NC Program panel above. The subsystem will remain in a “wait” state until the corresponding Sync code is encountered in the other subsystem(s). This feature corresponds to the Sync processing status used in the Call Stack panel.
Menu Bar

The menus located across the top of the NC Program panel provides easy access to major NC Program functions. Each menu contains groups of related functions. Click with the left mouse button on any menu name in the menu bar to display the list of functions available in that menu group. Click on the function in the menu you want to use. The name of the current NC program file is also displayed in this area.
File menu
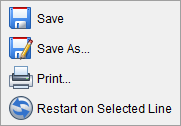
Save — Save the current NC program file
Save As — Save the current NC program file under a different name.
Print — Displays a window enabling you to specify print characteristics and print the NC program.
Mode — Use the features in this list to specify the "mode" that you want Vericut to be in.
Restart on Selected Line — Reruns the NC Program using the highlighted line as the starting point. Essentially functions as a Reset and Play button in one. When a restart is initiated on an NC Program that has edits, a prompt will display asking if the edits should be saved or discarded.
Go to Definition — When you highlight a given string of text, you can use this option to find out what that text string means. For instance, if you highlight the string "P9000", then selecting this option would take you to the "P word" section in the G-Code Processing panel.
Edit menu
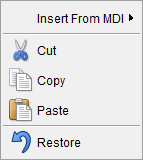
Insert From MDI — Enables you to insert NC blocks from the NC Blocks List, in the MDI window, into the NC program displayed in the NC Program panel.
-
Selected Lines — Use to insert one, or more, highlighted blocks in the MDI window, NC Blocks List, after the selected block in the NC Program panel.
-
All Lines — Use to insert all blocks in the MDI window, NC Blocks List, after the selected block in the NC Program panel.
Cut — Cuts the highlighted text in the NC program listing and puts it in the paste buffer.
Copy — Copies the highlighted text in the NC program listing to the paste buffer.
Paste — Puts the contents of the paste buffer at the location of the cursor in the NC program listing.
Restore — Use to remove all edits from the NC program listing, restoring it to its pre-edited state.
Mode menu
Use the features on this menu to select between three potential modes for NC Program
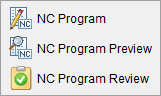
NC Program — The default mode. Use to switch back to the standard after using the other two options.
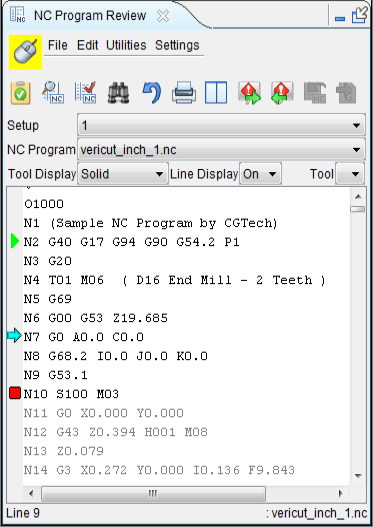
NC Program Preview — Use this icon to activate NC Program Review mode.
NC Program Review — Use this icon to put Vericut in NC Program Review mode and displays the tool trace represented by the NC program and the design model. This feature can be used without processing the NC Program first, as required by NC Program Review.
Debug menu
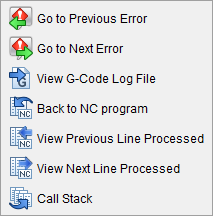
Go To Next Error — Navigates the NC Program to the next error and highlights the error for added visibility. This icon only appears when errors are present. Errors display in red.
Go To Previous Error — Navigates the NC Program to the previous error and highlights the error for added visibility. This icon only appears when errors are present. Errors display in red.
View G-Code Log File — Pulls up the G-Code Log File. This features is grayed out until the G-Code Log File is created and Debug settings are specified in the Settings window > G-Code Outputs tab. If you highlight a line of the NC Program before clicking this button, the corresponding line in the G-Code Log File will also be highilghted.
Back to NC Program — Returns the NC Program.
View Previous Line Processed — Jumps back to an earlier line.
View Next Line Processed — Jumps ahead to the next line.
Call Stack — Opens the Call Stack panel.
Utilities menu
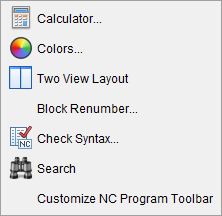
Calculator — Opens the Calculator window enabling you to do mathematical calculations and conversions inside Vericut.
Colors — Opens the NC Program Color window enabling you specify colors for specific features (comments, variable, macros, etc.) in the NC Program listing.
Block Renumber — Opens the Block Renumber window enabling you to renumber one, or more blocks, in the NC program and specify format characteristics to be used for block numbering. The formats specified must conform to the characteristics defined in the current control file.
Check Syntax — Displays the Check Syntax window enabling you to check the displayed NC program for syntax errors.
Search — Displays the search tools window.
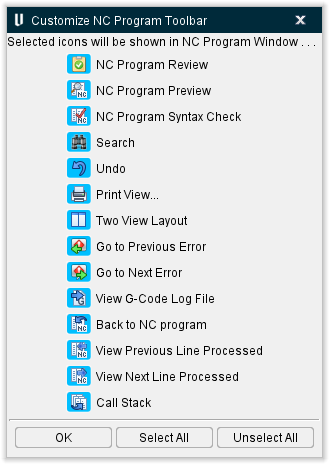
Customize NC Program Toolbar — Opens the Customize NC Program Toolbar enabling you to edit which icons appear in the icon bar. Click displayed icons to highlight ore remove highlight in the window and the toolbar will update simultaneously to add highlighted items and remove non highlighted items. Select All will highlight all icons and Unselect All will remove highlight from all icons. Select OK to finish.
📝 NOTE: The Utilities features are only available for G-Code NC programs.
Icon Bar
![]()
The items in the Icon Bar enable you to enter or exit NC Program Review or NC Program Preview mode, search for specific items in the NC program listing, print the NC program listing. Moving the cursor over the icon will display the name of the option.
![]() NC Program Review — Use this icon to switch between standard Vericut mode and NC Program Review mode (ref. NC Program Review, in the Analysis tab section of Vericut Help for more information).
NC Program Review — Use this icon to switch between standard Vericut mode and NC Program Review mode (ref. NC Program Review, in the Analysis tab section of Vericut Help for more information).
![]() NC Program Preview — Use this icon to put Vericut in NC Program Review mode and displays the tool trace represented by the NC program and the design model. This feature can be used without processing the NC Program first, as required by NC Program Review. See NC Program Preview, in the Analysis tab section of Vericut Help for more information.
NC Program Preview — Use this icon to put Vericut in NC Program Review mode and displays the tool trace represented by the NC program and the design model. This feature can be used without processing the NC Program first, as required by NC Program Review. See NC Program Preview, in the Analysis tab section of Vericut Help for more information.
![]() NC Program Syntax Check — Displays the Check Syntax window enabling you to check the displayed NC program for syntax errors.
NC Program Syntax Check — Displays the Check Syntax window enabling you to check the displayed NC program for syntax errors.
![]() Search — Displays the search tools window as shown in the panel below.
Search — Displays the search tools window as shown in the panel below.
💡 Tip: You can also use the Ctrl + “F” key to display the search tools window.
Line Number or Search Text — Use this text field to enter a line number or a string of text to search for.
![]() Go to Line Number — Moves the cursor in the NC program listing to the line number specified in the Line Number or Search Text field.
Go to Line Number — Moves the cursor in the NC program listing to the line number specified in the Line Number or Search Text field.
 Search Forward — Searches forward in the NC program listing for the text string specified in the Line Number or Search Text field.
 Search Backward — Searches backward in the NC program listing for the text string specified in the Line Number or Search Text field.
Replacement Text — Use this text field to enter a "replacement text" string.
![]() Replace One — Replace one occurrence of text string in the Line Number or Search Text field (or the highlighted text in the NC program listing) with the text string in the Replacement Text field.
Replace One — Replace one occurrence of text string in the Line Number or Search Text field (or the highlighted text in the NC program listing) with the text string in the Replacement Text field.
![]() Replace All — Replace all occurrences of the text string in the Line Number or Search Text field with the text string in the Replacement Text field.
Replace All — Replace all occurrences of the text string in the Line Number or Search Text field with the text string in the Replacement Text field.
 Close — Closes the display of the search tools window.
💡 Tip: You can also click on the ![]() (Search) icon again to remove the display of the search tools window.
(Search) icon again to remove the display of the search tools window.
![]() Undo Highlighted Changes — Undoes changes made to the NC program. Highlight the change and then click on the icon to "undo" the change.
Undo Highlighted Changes — Undoes changes made to the NC program. Highlight the change and then click on the icon to "undo" the change.
![]() Print — Prints the NC program listing.
Print — Prints the NC program listing.
![]() /
/![]() Tile Vertical/Tile Horizontal — Use to specify that multi-channel NC program listings display tiled vertically or horizontally. See the "Tiled Vertical" picture and the Tiled Horizontal" picture for examples. The icon toggles between Tile Vertical and Tile Horizontal.
Tile Vertical/Tile Horizontal — Use to specify that multi-channel NC program listings display tiled vertically or horizontally. See the "Tiled Vertical" picture and the Tiled Horizontal" picture for examples. The icon toggles between Tile Vertical and Tile Horizontal.
 Go To Next Error — Navigates the NC Program to the next error and highlights the error for added visibility. This icon only appears when errors are present. Errors display in red.
 Go To Previous Error — Navigates the NC Program to the previous error and highlights the error for added visibility. This icon only appears when errors are present. Errors display in red.
![]() View G-Code Log File — Pulls up the G-Code Log File. This features is grayed out until the G-Code Log File is created and Debug settings are specified in the Settings window > G-Code Outputs tab. If you highlight a line of the NC Program before clicking this button, the corresponding line in the G-Code Log File will also be highilghted.
View G-Code Log File — Pulls up the G-Code Log File. This features is grayed out until the G-Code Log File is created and Debug settings are specified in the Settings window > G-Code Outputs tab. If you highlight a line of the NC Program before clicking this button, the corresponding line in the G-Code Log File will also be highilghted.
 (Back to NC Program) — This icon is normally grayed out except under specific conditions.
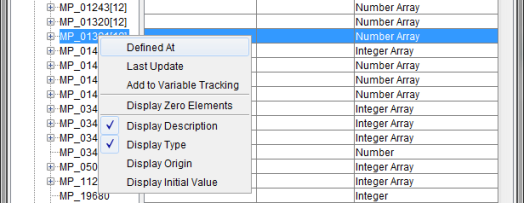
On the All or Recent Variables panel, right clicking on a variable from a Control INIT File, a Machine INIT File, or a Run Time variable will display a pop-up menu. Selecting either the Define At or Last Updated option from the menu will display the control INIT, Machine INIT, or NC program file where the variable was defined or last updated. The record where the variable was defined or last updated will be highlighted.
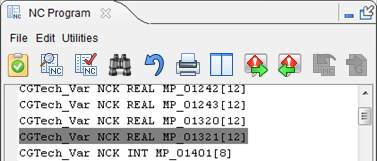
The Back to NC Program feature will become active and clicking on it will re-display the currently running NC Program in the NC Program panel.
Example
- Open the “standard” Vericut part, vericut.vcproject in the library folder of your Vericut installation.
-
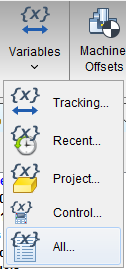
In the Info tab, select Variables > All.
-
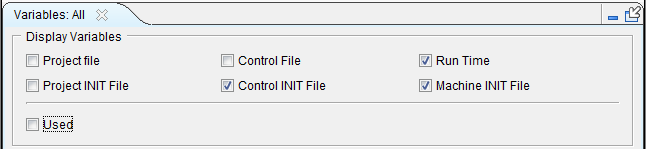
In the Variables panel that displays, toggle off every checked item until only Control INIT File, Run Time, and Machine INIT File are toggled on (checked).
-
Right click on any variable and select Defined At or Last Update from the menu displays. This opens the NC Program panel which will display the Control INIT, Machine INIT, or NC Program file where the variable was defined or last updated. Note that the Back to NC Program icon is now active.
-
Click the Back to NC Program icon to re-display the current running NC Program in the NC Program panel.
See Variables Panel section of the Vericut Help , for additional information on the features available in the Variables panel.
Stop At (Break Point) Options
Stop At options, also called Breakpoint options, provide ways to specify conditions for stopping NC program processing. The options provided in the NC Program are only a couple of ways to specify Stop At (Breakpoint) locations in Vericut.
See Start At/ Stop At Options window section of for complete information on specifying starting and stopping conditions for processing NC programs.
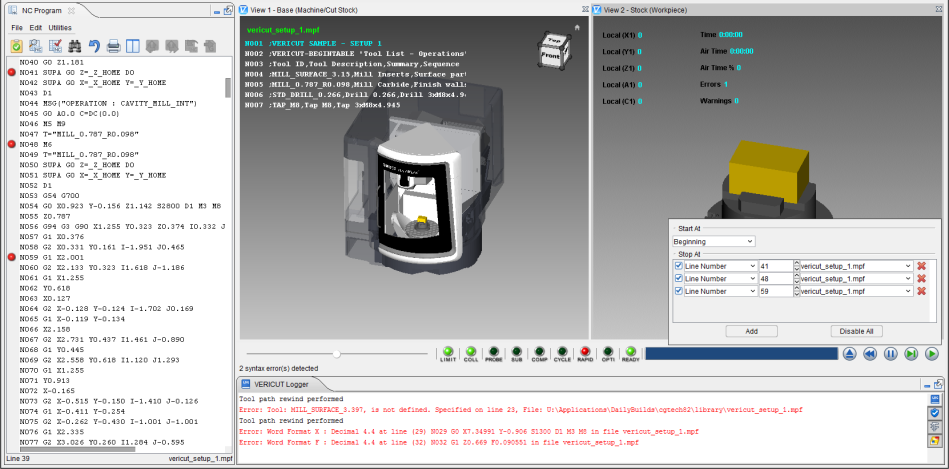
When Line Number type Stop At condition records are added in the Start At / Stop At window,  markers are displayed at those lines in the NC Program panel as shown in the picture below.
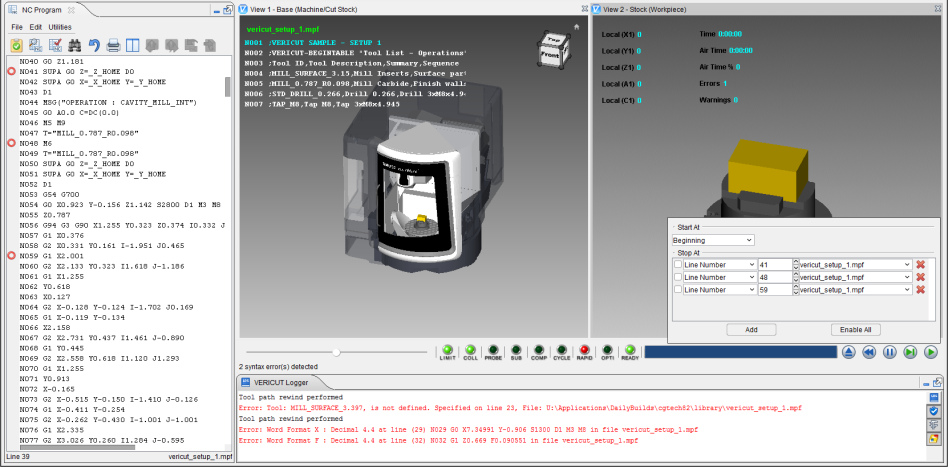
When Line Number type Stop At condition records (Breakpoints) are added in the Start At / Stop At window that are inactive (not checked),  markers are displayed at those lines in the NC Program panel as shown in the picture below.
You also have the ability to add, activate, de-activate or remove Line Number type Stop At condition records (Breakpoints). Each of the features in each of the menus is described below.
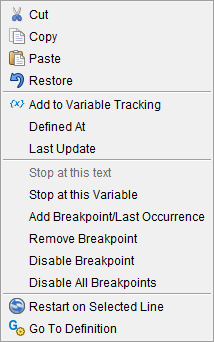
If you right click on a line with an active Line Number marker, the following menu will display.
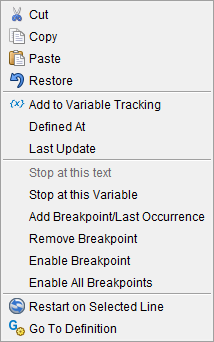
If you right click on a line with an inactive Line Number marker , the following menu will display.
If you right click on a line with a Breakpoint/Last Occurrence marker  , the following menu will display:

If you right click on a line without a Line Number marker, or on any blank area in the NC Program panel, the following menu will display.
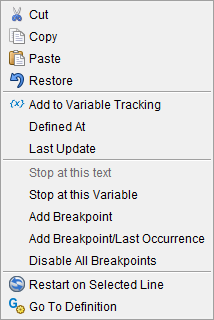
If you highlight text and the right click on that line, the following menu will display.

Cut, Copy, Paste, and Restore provide the same functionality as those available under Edit in the menu bar.
Add to Variable Tracking — Adds the highlighted variable to the Tracking Variables section of the Variables panel (Project tab > Variables).
Defined At — Opens the NC Program panel and displays the file and line of code where the variable is defined.
Last Update — Opens the NC Program panel and displays the file and line of code where the variable was last updated. The line of code where the variable was last updated is highlighted.
Stop at this text — The Stop at this text feature enables you to select text in the NC program record and have the Stop At feature in the Start-Stop Options window automatically add a new Text “stop at” (Breakpoint) record for the selected text. Use of this feature does the following in the Start-Stop Options window:
-
Creates a new “stop at” Text record.
-
Sets the Active / Inactive checkbox to “active” (checked).
- Sets “text field” in the Text record to the text highlighted in the NC program.
📝 NOTES:
-
Adding a Text “stop at” (Breakpoint) record will not display a
marker in the NC program. -
The added Text “stop at” (Breakpoint) record can only be removed in the Start At / Stop At Options window.
Example:
-
In the NC Program panel, highlight the text where you want NC program Processing to stop.
-
Right click in the NC Program panel and select the Stop at this text option from the menu that displays.
The Text “stop at” (Breakpoint) record like the following picture will be added to the Start At / Stop At Options window.

Stop At This Variable —
-
Add Breakpoint — The Add Breakpoint feature enables you to select a record in the NC program record and have the Stop At feature in the Start-Stop Options window automatically add a new Line Number “stop at” (Breakpoint) record at the selected line number. Use of this feature does the following in the Start At / Stop At Options window:
-
Creates a new “stop at” Line Number record.
-
Sets the Active / Inactive checkbox to “active” (checked).
- Sets “Line Number” in the Line Number record where the cursor was when the right click was made to display the menu.
- Sets the NC program file name in the Line Number record to the current NC program.
-
Adds a Stop At (Breakpoint) marker
to the current line in the NC program. -
Remove Breakpoint — Removes the Line Number “stop at” (Breakpoint) record for the selected line in the NC program from the Start At / Stop At Options window.
-
In the NC Program panel, select the line with the Stop At (Breakpoint) marker
that you want to remove. -
Right click in the NC Program panel and select the Remove Breakpoint option from the menu that displays.
-
The Stop At (Breakpoint) marker
in the NC Program panel is removed and the Line Number “stop at” (Breakpoint) record in the Start At / Stop At Options window is removed just like using the  (Remove Breakpoint) button in the record itself.
 -
Add Breakpoint/Last Occurrence — Sets the Active / Inactive checkbox for the Line Number/Count "stop at" (Breakpoint) record for the selected line in the NC program to "active" (checked) in the Start At / Stop At Options window.
-
In the NC Program panel, select the line that has the “active” Line Number “stop at” (Breakpoint) record that you want to be “inactive”.
-
Right click in the NC Program panel and select the Add Breakpoint/Last Occurrence option from the menu that displays.
-
The Active / Inactive checkbox for the Line Number/Count “stop at” (Breakpoint) record in the Start At / Stop At Options window will be toggled off as shown below.
-
The Breakpoint/Last Occurrence marker (
) will be added to the line. -
Disable Breakpoint — Sets the Active / Inactive checkbox for the Line Number “stop at” (Breakpoint) record for the selected line in the NC program to “inactive” (not checked) in the Start At / Stop At Options window.
-
In the NC Program panel, select the line that has the “active” Line Number “stop at” (Breakpoint) record that you want to be “inactive”.
-
Right click in the NC Program panel and select the Disable Breakpoint option from the menu that displays.
-
The Active / Inactive checkbox for the Line Number “stop at” (Breakpoint) record in the Start At / Stop At Options window will be toggled off as shown below.
-
Enable Breakpoint — Sets the Active / Inactive checkbox for the Line Number “stop at” (Breakpoint) record for the selected line in the NC program to “active” (checked) in the Start At / Stop At Options window.
-
In the NC Program panel, select the line that has the “inactive” Line Number “stop at” (Breakpoint) record that you want to be active.
-
Right click in the NC Program panel and select the Enable Breakpoint option from the menu that displays.
-
The Active / Inactive checkbox for the Line Number “stop at” (Breakpoint) record in the Start At / Stop At Options window will be toggled on as shown below.
Tool Tip Capabilities
The Tool Tip capabilities within the NC Program panel enable you to determine the values of variables and expressions by highlighting the variable or expression and then holding the cursor over the highlighted characters. Vericut will display a tip showing the value of the highlighted variable or expression as shown in the picture below. This example is evaluating the expression SIN(45)45(1+COS(30). Tool Tip capabilities can also be used to highlight G and a number or M and a number which will then produce a matching entry in the word address table.
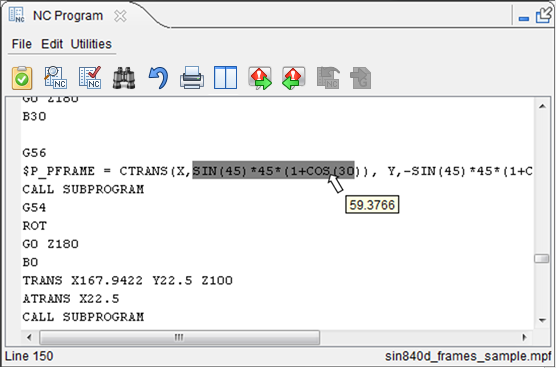
The Tool Tip capability can handle just about any variable or expression that is valid for the current control file. This includes both number and text variables. For arrays or frames, Vericut will tell you what you have (Array of Numbers, Frame, …), but not the corresponding values.
The following are examples of what is supported by this capability:
\(P_GG_STACK[\)P_STACK,9] (a particular value within a frame)
$P_PROG[0] (a specific string within an array of strings)
#2 < 270.(evaluation of an expression : 0 or 1)
#4(simple variable tag value)
📝 NOTE: The new logic goes through the standard parser for the loaded control. This is a subset of the processing that is done when parsing the line. Caution must be used when highlighting variables and expressions because it could actually cause an action.
For example: If you highlight a variable tag variable that is not defined yet, Vericut will create it, and might give you the following message in the logger:
“Warning: nc_variable 103 not defined”
If you highlight something within a comment that is not valid within the language of the control file, you will get the corresponding parsing error messages written to the logger.
The following table shows some examples of highlighted characters and what will be returned in the tip from Vericut.
| Highlighted Characters | Returned Tip |
|---|---|
| M30 | 30 |
| G#2 | The value of variable 2 (assuming # is a variable tag) |
| $P_GG[13] = 1 | The value of $P_GG[13] |
| $P_GG[13] = 1 | “Array of Numbers” |
| $P_GG[13] = 1 | 1 |
| IF( $P_GG[13]==1 ) | 0 if $P_GG[13] does not equal 1, otherwise returns 1 |
| IF( $P_GG[13]==1 ) | 0 if $P_GG[13] does not equal 1, otherwise returns 1 |
| IF($MN_SCALING_SYSTEM_IS_METRIC) | The value of $MN_SCALING_SYSTEM_IS_METRIC |
| IF( $P_GG[13]==1 ) | The highlight is invalid. It is not a value or an expression. Results are unpredictable. |
| IF($MN_SCALING_SYSTEM_IS_METRIC) | The highlight is invalid. It is not a value or an expression. Results are unpredictable. |