Sequencing card
![]() (New Sequence) — Adds a new sequence to the bottom of the sequence list. The sequence is named “Sequence” followed by an incremental numeric value.
(New Sequence) — Adds a new sequence to the bottom of the sequence list. The sequence is named “Sequence” followed by an incremental numeric value.
![]() (Delete selected items in the sequence list) — Deletes the selected item from the sequence list. If the Sequence name is highlighted, the Sequence and all data points are deleted from the sequence list. If one or more specific data points are highlighted in the Sequence, those data points are deleted from the Sequence.
(Delete selected items in the sequence list) — Deletes the selected item from the sequence list. If the Sequence name is highlighted, the Sequence and all data points are deleted from the sequence list. If one or more specific data points are highlighted in the Sequence, those data points are deleted from the Sequence.
![]() (Pick a series of points and add them to the selected sequence list) — When selected, the button is highlighted in yellow. You can add data points to the selected
Sequence by clicking data points in the graphics area.
(Pick a series of points and add them to the selected sequence list) — When selected, the button is highlighted in yellow. You can add data points to the selected
Sequence by clicking data points in the graphics area.
![]() (Show current sequence only) — Toggles between displaying only the data points for the selected sequence in the Design Locations table and displaying all data points in the Design Locations table.
(Show current sequence only) — Toggles between displaying only the data points for the selected sequence in the Design Locations table and displaying all data points in the Design Locations table.
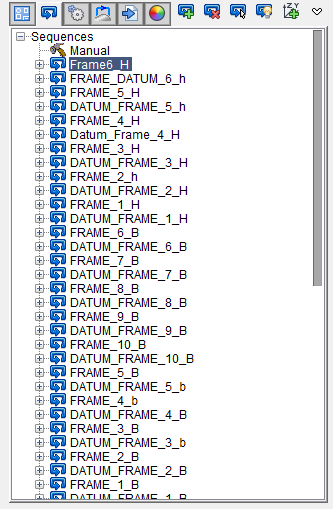
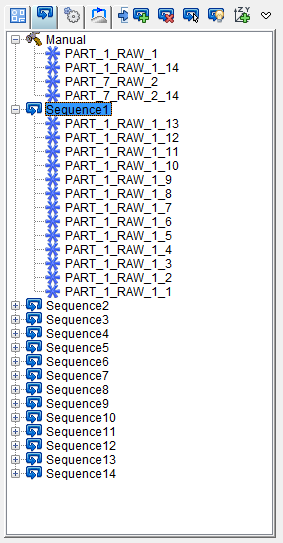
Sequence List — The sequence list contains the name of every Sequence defined for the NC program. For each Sequence, the list shows the name of every data point assigned to the Sequence.
![]() Add Coordinate System Location in the Selected Sequence — Enables to program any location by using a defined Coordinate System from the VDAF Project Tree.
Add Coordinate System Location in the Selected Sequence — Enables to program any location by using a defined Coordinate System from the VDAF Project Tree.
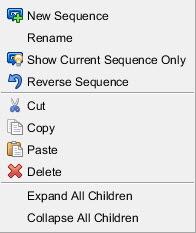
Sequencing Card Tab Right Mouse Button Menu
The features in the Sequencing Card Tab, right mouse button menu allow you to rename a sequence, display only the data points for a selected Sequence, or reverse the order of data points in a selected Sequence.
New Sequence — Adds a new sequence to the bottom of the sequence list. The sequence is named “Sequence” followed by an incremental numeric value.
Rename — Enables you to rename the currently selected Sequence.
Show Current Sequence Only — Displays only the data points for the selected sequence in the Design Locations table.
Reverse Sequence — Reverses the order of the list of data points for the selected Sequence. For example, the first data point becomes the last data point in the list.
Cut — Cuts the highlighted text in the file listing and puts it in the paste buffer.
Copy — Copies the highlighted text in the file listing to the paste buffer.
Paste — Puts the contents of the paste buffer at the location of the cursor in the file listing.
Delete — Deletes the current selection from the Sequencing Card.
Expand All Children — Expands selected sequences.
Collapse All Children — Collapses selected sequences.
Adding a Data Point to a Sequence
You can add data points to a sequence by highlighting data points in the graphics area and dragging and dropping data points from the Design Locations table to the Sequence List.
- Select the Sequencing card.
-
In the Sequence list, select the Sequence you want to add data points to.
-
In the toolbar, click
 (Use Mouse to Select or Unselect Locations by Box).
 -
In the graphics area, click and drag a box around the data points you want to add to the selected Sequence. The data points you select are highlighted in red in the graphics area. The data points you select are also highlighted in the Design Locations table.
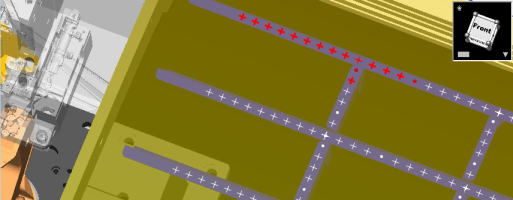
💡 Tip: You can deselect highlighted data points by holding the CTRL key and clicking the data point in the graphics area. -
Drag the selected data points from the Design Locations table to the selected Sequence. The data points are added to the Sequence list in the order in which they appeared in the Design Locations table.
Deleting a Data Point from a Sequence
- Select the Sequencing card.
-
In the Sequence list, select the data points you want to remove from the Sequence.
💡 Tip: You can hold the CTRL key to select multiple data points. -
Click
 (Delete Selected Items in the Sequence List).
 - Select Yes to delete the data points.
Drag and Drop Sequence
-
Select the Sequence card.
-
In the Sequence list, select and hold sequences you want to move. Drag and drop these sequences to the new location of your choice.
💡 Tip: You can perform multi-selection sequences with CTRL or SHIFT keys.