NC Program
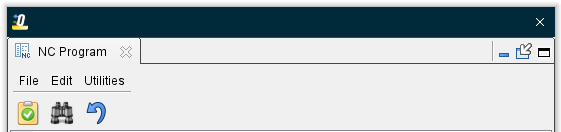
The NC Program command button opens the NC Program Review panel which enables you to quickly and easily view, replay and edit a previously processed NC program (toolpath). NC Program Review can be accessed at any point in the verification process; however, only information related to the "current" setup is available for review. It does not interrupt the current verification status, so reset or rewind of the NC program is not necessary.
📝 NOTE: The following conditions must be met before a NC program can be viewed with NC Program Review.
- The NC program must be processed far enough so that a tool has been loaded and at least one tool motion has been processed after the tool is loaded.
- There must be a model attached to the first "Stock" type component in the Component Tree.
- The first "Stock" type component must be visible in a workpiece view.
NC Program Review mode the main window changes in the following ways:
-
The icons in the Toolbar associated with the features in the menus listed above are also not available. If selected the message "Action not allowed in the NC Program Review panel" will display at the bottom of the Error Listing area.
-
The graphics display will change and lines representing the actual tool paths will be displayed.
- The NC Program Review, Error Listing area, will replace the Logger.
- Two additional icons,
 (Step Backward) and
  (Play Backward) are added to the Simulation (VCR) Controls.
 - The NC Program Review panel will display. If the NC Program panel is already displayed, it will be replaced by the NC Program Review panel.
Each of these changes is described in detail in the sections that follow.
The NC Program Review main window is composed of three distinct areas, each with different user interaction. The window header displays the current NC program file. This window can be moved and resized like most other windows, via dragging the window header, sides or corners. In addition, the size of the NC Program Listing, Error Listing, and Graphics areas can be changed within the main window by dragging the adjoining sides of each area.
NC Program Review enables you to quickly and easily associate the NC program record, the motion resulting from it, and any errors that may be associated with it. The three areas of the window are linked together so that if you select a NC program record in the listing, the tool moves to the corresponding location in the graphics area. If you select a location in the graphics area, the corresponding NC program record is highlighted in the NC program listing. If you select an error in the error listing, the NC program record that caused the error becomes highlighted in the NC program listing and the tool moves to the position where the error occurred in the graphics area.
NC Program Listing* — This area displays a listing of the NC program records. In this area you can manually edit, add, or delete NC program records. Save the modified NC program file or open another NC program file associated with the current project file. You can also set Start and End markers to define the range of NC program records that you want to review. For more information about this portion of the NC Program Review main window, see the NC Program Listing Area section below.
Error Listing* — This area displays a list of the errors that Optimizer found while processing the NC program. For more information about this portion of the NC Program Review main window, see the Error Listing Area section below.
Graphics Area — This area displays a visual representation of the motion associated with the records in the NC Program Listing. Here you can control how the tool is displayed, the method and direction of the replayed NC program as well as the speed of the replay. For more information about this portion of the NC Program Review main window, see the Graphics Area section below.
NC Program Review, NC Program Listing Area
The NC Program Review panel, or NC Program Listing panel, contains a listing of the NC program records. Features in this panel enable you to edit, save, or print the NC program, and define display characteristics, and ranges for replay of the NC program.
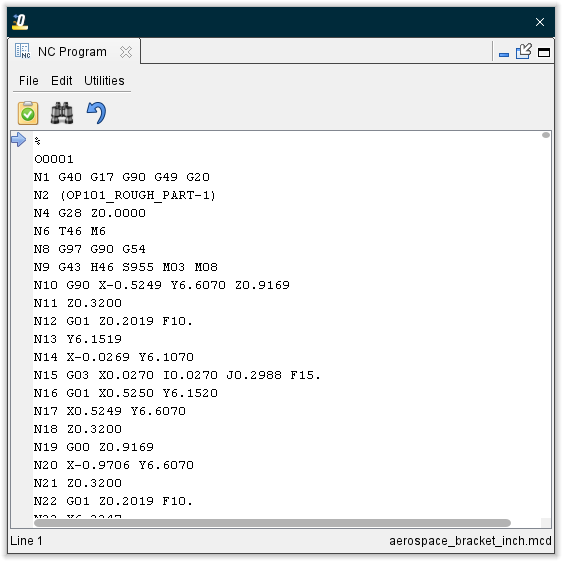
The NC Program Listing panel is one of the dockable panels enabling you to dock it inside the main window if you choose.
📝 NOTE: When the NC Program Listing panel is docked, make sure that you click in the panel so that it becomes the "active" panel before using F1 to get help specific to the panel. Otherwise F1 will go to the Vericut Help Library.
 (Close) — Located at the end of the tab, this icon enables you to close the NC Program Listing panel.
Menus and Icon Bar
File menu
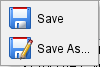
Save and Save As — Saves the NC Program. Save As opens a Save As window enabling you to specify the preferred file name.
Edit menu
The Edit menu can also be accessed by right-clicking anywhere in the NC Program Listing Area.
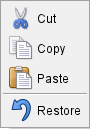
Cut — Removes a highlighted section and stores it for later use.
Copy — Saves a highlighted section for later use.
Paste — Inserts a previously cut or copied section.
Restore — Use to remove all edits from the NC program listing, restoring it to its pre-edited state.
Utilities menu
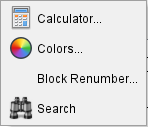
Calculator — Opens the Calculator window enabling you to do mathematical calculations and conversions inside Optimizer.
Colors — Opens the NC Program Color window enabling you specify colors for specific features (comments, variable, macros, etc.) in the NC Program listing.
Block Renumber — Opens the Block Renumber window, enabling you to renumber one, or more blocks, in the NC program and specify format characteristics to be used for block numbering. The formats specified must conform to the characteristics defined in the current control file.
Search — Opens the Search subpanel in the NC Program Review.
Icon Bar
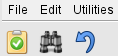
 NC Program Review — Activates NC Program Review mode.
 Search — Identical functionality to Utilities > Search above.
 Undo highlighted changes — Reverts highlighted section of NC Program to what it was before the most recent change.
Calculator
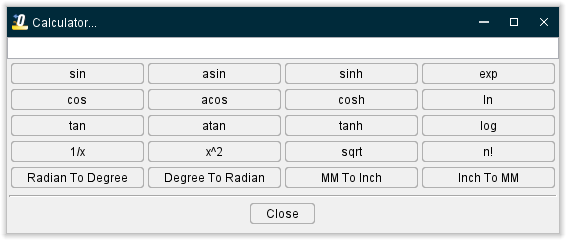
This window enables you to do mathematical calculations and conversions inside Optimizer.
-
sin — Returns the sin of the angle specified. Enter the angle, in degrees, in the text field.
-
asin — Returns the arc sine of the value entered in the text field. The specified value must be in the range of -1.0 to 1.0. The returned value is in degrees, and is in the range of -90.0 to 90.0.
-
sinh — Returns the hyperbolic cosine of the given angle. Enter the angle, in degrees, in the text field.
-
exp — Returns the natural logarithm "e" raised to the specified power specified in the text field.
-
cos — Returns the cosine of the specified angle. Returns the hyperbolic tangent of the given angle specified in degrees.
-
acos — Returns the arc cosine of the value entered in the text field. The specified value must be in the range of -1.0 to 1.0. The return value is in degrees, and is in the range of 0.0 to 180.0.
-
cosh — Returns the hyperbolic cosine of the specified angle. Enter the angle, in degrees, in the text field.
-
ln — Returns the natural logarithm of the value entered in the text field.
-
tan — Returns the tangent of the specified angle. Enter the angle, in degrees, in the text field.
-
atan — Returns the arc tangent of the value entered in the text field. The specified value must be in the range of -1.0 to 1.0. The return value is in degrees, and is in the range of -90.0 to 90.0.
-
tanh — Returns the hyperbolic tangent of the specified angle. Enter the angle, in degrees, in the text field.
-
log — Returns the base 10 logarithm of the value entered in the text field. The specified value must be positive otherwise zero is returned.
-
1/x — The inverse key replaces the variable x with the value entered in the text field and returns the answer in the format of a decimal point fraction.
-
x^2 — Returns the square of the value entered in the text field.
-
sqrt — Returns the square root of the value entered in the text field.
-
n! — Returns the factorial value (n! = 1· 2· 3· · · (n − 2)(n − 1)n ) of the number entered in the text field.
-
Radian To Degree — Returns the "degree" equivalent of the "radian" angle value entered in the text field.
-
Degree To Radian — Returns the "radian" equivalent of the "degree" angle value entered in the text field.
-
MM To Inch — Returns the "inch" equivalent of the "millimeter" value entered in the text field.
-
Inch To MM — Returns the "millimeter" equivalent of the "inch" value entered in the text field.
-
Close — Closes the Calculator window.
NC Program Color window
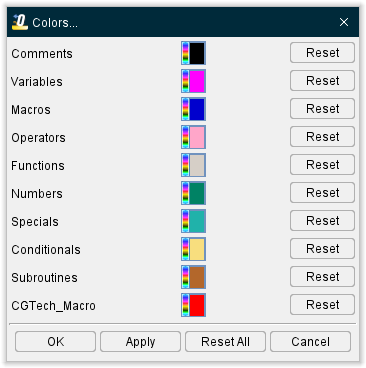
This window enables you specify colors for specific features (comments, variable, macros, etc.) in the NC Program listing.
-
 (Color Palette)— The Color Palette icon next to each NC program feature, enables you to specify a color for that particular NC program feature. The right side of the Color Palette icon shows the current color of the NC program feature. To change the color for the NC program feature, click on the (Color Palette) icon to display the color palette window shown below.
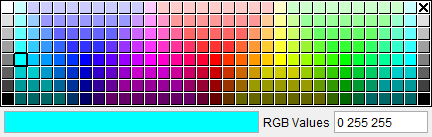
Click on a color in the color palette window, to specify the color for the NC program feature. The color palette window will close and the right side of the (Color Palette) icon in the NC Programs Color window will update to reflect the selected color.
To close the color palette window without changing the color, click on the in the upper right corner of the color palette window.
When you have finished with color selection, use the OK button, described below, to apply the colors to the NC program listing in the NC Program (Info) window. -
Reset — Use the Reset button next to each NC program feature to return the color for the particular feature back to its default color.
-
OK — Applies the color settings to the to the NC program text displayed in the NC Program window and closes the NC Program Colors window.
-
Apply — Applies the color settings to the to the NC program text displayed in the NC Program window and leaves the NC Program Colors window.
-
Reset All — Use the Reset All button to return the color for all NC program features back to its default color.
-
Cancel — Ignores your color setting changes and closes the NC Program Colors window.
Block Renumber
This window enables you to renumber one, or more blocks, in the NC program and specify format characteristics to be used for block numbering. The formats specified must conform to the characteristics defined in the current control file.
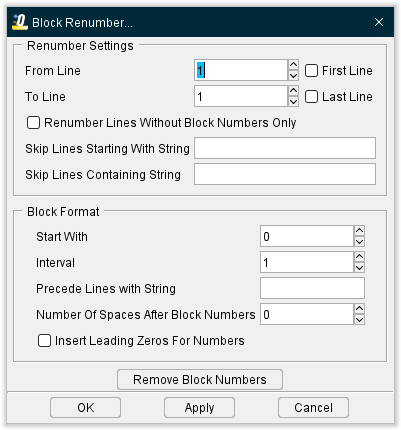
Renumber Settings
Use the Renumber Settings options to specify where to start, and stop, renumbering.
From Line — Use this feature to specify the line in the NC program to begin the renumbering.
First Line — When toggled "On" renumbering will begin at the first line in the NC program.
To Line — Use this feature to specify the line in the NC program to stop the renumbering.
Last Line — When toggled "On" renumbering will stop at the last line in the NC program.
Renumber Lines Without Block Numbers Only — When toggled "On", only blocks within the specified range that do not currently have block numbers will be renumbered.
Skip Lines Starting with String — Enables you to specify a string of characters, that when found at the start of the block, will cause Optimizer to skip the block during the renumbering process.
Skip Line Containing String — Enables you to specify a string of characters, that when found anywhere within the block, will cause Optimizer to skip the block during the renumbering process.
Block Format
Use the Block Format options to specify the format, and number sequence, to use for block numbers. The formats specified must conform to the characteristics defined in the current control file.
Start With — Use this feature to specify the starting number to use for the renumbering sequence.
Interval — Use this feature to specify the increment between numbers to be used for the renumbering sequence.
Precede Lines With String — Use this feature to specify a character, or string of characters, to be used before the block number.
Number Of Spaces After Block Numbers — Use to specify the number of blank spaces to be used between the block number and the next item in the block.
Insert Leading Zeros For Numbers — When toggled "On" leading zeros will be used in the block number.
Remove Block Numbers — Removes all block numbers from the NC program file. Block numbers are identified by the characteristics defined in the current control file.
OK — Applies the new block numbers, as specified, to the NC program file and closes the Block Renumber window.
Apply — Applies the new block numbers, as specified, to the NC program file and leaves the Block Renumber window open.
Cancel — Closes the Block Renumber window without changing the NC program file.
Search Subpanel
This subpanel enables you to search through the NC Program.
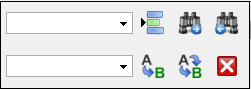
Line Number or Search Text — Use this text field to enter a line number, or a string of text, to search for.
 Got Line Number — Moves the cursor in the file listing to the line number specified in the Line Number or Search Text field.
 Search Forward — Searches forward in the file listing for the text string specified in the Line Number or Search Text field.
 Search Backward — Searches backward in the file listing for the text string specified in the Line Number or Search Text field.
Replacement Text — Use this text field to enter a "replacement text" string.
 Replace One — Replace one occurrence of text string in the Line Number or Search Text field (or the highlighted text in the file listing) with the text string in the Replacement Text field.
 Replace All — Replace all occurrences of the text string in the Line Number or Search Text field with the text string in the Replacement Text field.
 Close — Closes the window.
NC Program Review Mode Features
These features are only available when NC Program Review mode is active.
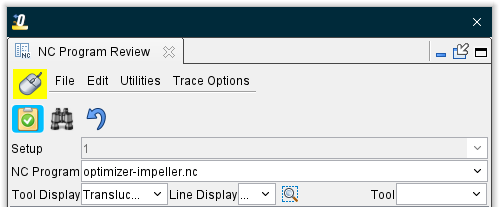
Mouse active to enable mouse tracking and picks, inactive to disable — Toggle this feature on to have NC Program track what you click on and then update to display the corresponding line of NC Program code.
Trace Options
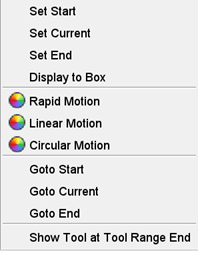
Set Start — While a line of code is highlighted, select this feature to have that line be the place where playback will begin upon next simulation.
Set Current — While a line of code is highlighted, select this feature to have that line become the currently active line. Graphics Area will update to reflect that stage of the simulation.
Set End — While a line of code is highlighted, select this feature to have that line be the place where playback will upon next simulation.
Display to Box — Selecting this option turns your mouse icon into a magnifying glass. Click and drag to create a bounding box over an area you want to inspect. Release the mouse button and NC Program will navigate to the relevant section of code associated with the area you selected.
Rapid Motion, Linear Motion, and Circular Motion — Use these features to set the display color for each of these types of motion.
Export Trace — Opens an Export Trace to IGES file selection window enabling you to save your Trace for later use.
Goto Start — Navigates the NC Program to the line of code that has the Start marker.
Goto Current — Navigates the NC Program to the line of code that has the Current marker.
Goto End — Navigates the NC Program to the line of code that has the End marker.
Setup — enables you to specify the Setup that you want to review. Choose the desired setup from the pull-down list. All of the setups contained in the current project file will be displayed in the pull-down list.
NC Program — enables you to specify the NC program in the Setup selected above that you want to review. Choose the desired NC program from the pull-down list. All of NC programs contained in the selected Setup will be displayed in the pull-down list.
Tool Display — enables you to specify how the tool is to be displayed in the graphics area while in NC Program Review. Choose Off (do not display tool), Solid, or Translucent from the pull-down list.
Line Display — enables you to specify whether or not to display the lines representing the tool's path in the graphics area while in NC Program Review. Choose Off (do not display), or On (display) from the pull-down list.
 (Use mouse to select display box) — Clicking on this feature highlights the icon in yellow and enables you to drag a zoom box around a cut stock section you wish to inspect. The zoom box finds the interactions with review trace or cut stock and sets start/end range accordingly. If you put your zoom box outside of cut stock, nothing will happen. Then play to the end of the file and use this feature on cut stock, appropriate start and stop ranges will then be generated in the NC Program area for replaying the highlighted section.
NC Program Listing Area
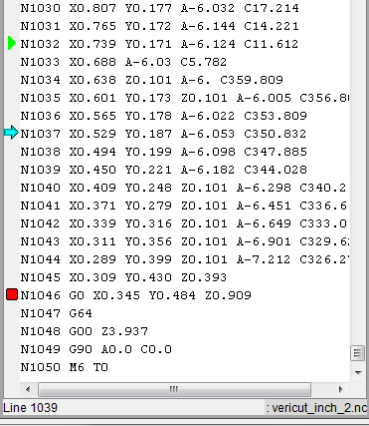
The line number of the "current" NC program record and "current" NC program is displayed at the bottom of the NC Program Listing area.
NC Program Editing
The NC program listing area allows you to edit the NC program with a full function text editor.
You can use the keyboard to add, change, or delete portions of the NC program listing. You can also use the Cut, Copy and Paste functions found under Edit in the main menu.
You can easily see the modifications that you have made to the NC program listing. Added, changed, and pasted text is displayed in blue and underlined. Cut and deleted text is displayed in red with a "strike through" font. Once you save the modified NC program, the red and deleted text is removed and the blue added, changed, and pasted text is returned to the original font.
The Start/Current/End markers can be found along the left side of the NC Program Listing area. The Start marker is represented by the green triangle  , the Current marker is represented by the aquamarine arrow
  , and the End marker is represented by the red square
  . You can easily identify each marker by moving the cursor over it.
The Start and End markers are used to define the range of NC program records that will be replayed when using Play to End. The Current marker moves to the NC program record that is currently being replayed.
Set these markers by either selecting an NC program record in the NC program listing or the location in the graphics area where you want the marker placed. Then select the appropriate option (Set Start, Set Current, Set End) from the menu displayed by the Settings menu in the NC Program Review panel.
You can also set these markers by right-clicking an NC program record in the NC program listing or the location in the graphics area where you want the marker placed. Then select the appropriate option (Set Start, Set Current, Set End) from the menu that displays.
You can also click on the appropriate marker in the NC program listing and drag it to the desired NC program record.
NC Program Review, Error Listing Area
The Error Listing area replaces the Logger while in NC Program Review. It contains a list of the errors that were found while processing the NC program in Optimizer.

Selecting an error in the Error Listing causes the line in the NC Program Listing associated with the error to become highlighted. At the same, the tool display in the Graphics Area moves to the position where the error occurred. This enables you to quickly and easily associate the error with the position in the NC program and in the toolpath display.
💡 Tip: Click with the right mouse button in the Error Listing Area to display the following menu.
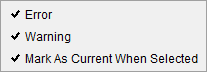
Its features enable you to specify whether or not to display only Errors, only Warnings, or both Errors and Warnings in the Error Listing Area. When toggled “on” (checked) the feature will be displayed. When toggled “off”, the feature will not be displayed. Click on the feature in the menu to toggle on/off.